Starting today: shop the products that will be retiring - while supplies last!
Shop my online store HERE. Host code is 3MF63KXH


Starting today: shop the products that will be retiring - while supplies last!
Shop my online store HERE. Host code is 3MF63KXH

Yesterday I received my March Paper Pumpkin Kit - the subscription stamping kit that you can order from Stampin' Up! The kits come monthly, and are all-inclusive with products to make several cards. Instructions are included in each kit to create the cards. BUT you can also use the components to create alternative cards & projects. Today I'll share two alternative cards I made.
This month's kit included a surprise "extra" - a package of 4 stencils.

I used the sun, clouds, and mountain stencils on my cards. The kit included a stamp for the trees that I also used on one card. Then I added a stamp from Field of Flowers to stamp the grasses and flowers in the foreground. The sentiment on the card with the mountains & trees is included in the kit; the sentiment for Spring is from Springtime Joy stamp set.


The Paper Pumpkin Kits are available to order each month by the 10th of the month. You can also pre-pay for 3- , 6-, or 12-months. For all the details, go to paperpumpkin.com or simply click HERE.
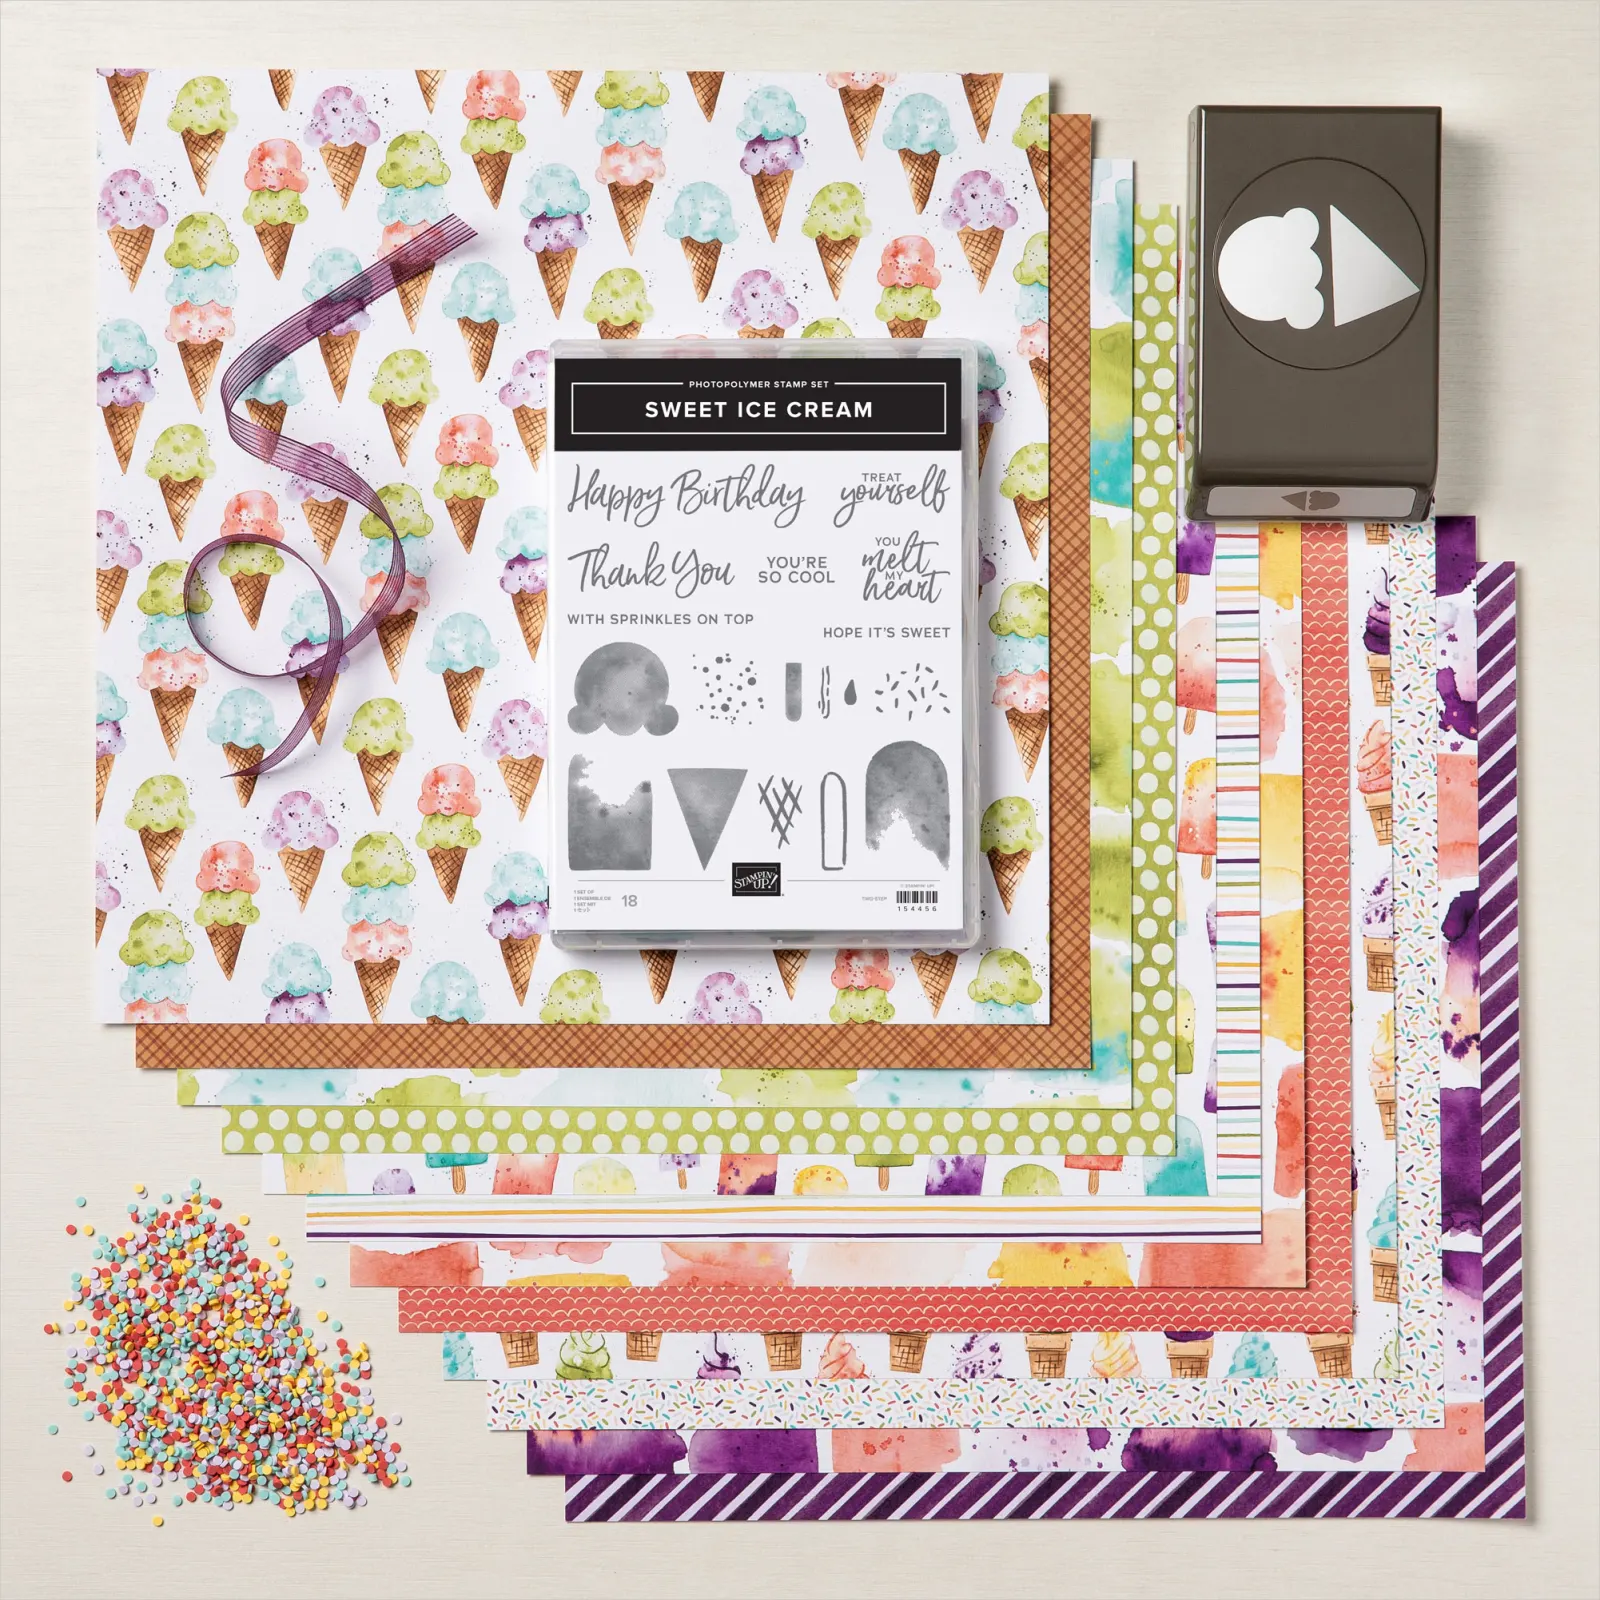
Here is a preview of the kit for April. Order by April 10 to get it.

This kit will even coordinate with the products in the Ice Cream Corner Suite in the Mini Catalog. See pp 48-49. Fun & yummy looking, would you agree? click ICE CREAM
Wednesday March 24 - Retiring Products List
Check back tomorrow to see the list of items that will be Retiring (not carrying over to the new Annual Catalog). These will be available while supplies last, only.
Retiring 2019-2021 In Colors

Don't miss any Stampin' Up! updates and news: Subscribe to my blog to receive all future posts directly to your inbox. Simply use the form on the top right panel.
Thanks for taking a look today. I hope you like the cards and found some inspiration. If not already a subscriber to the Paper Pumpkin Monthly Kits, I hope you will give them a try.
Stay safe, be well, take care,
~JULIE
Hello, and Happy First Day of Spring!!
We've had some recent rains, and the trees are out in bloom, the grasses coming up bright green on the hillsides, and the chickadees are nesting once again in the bird house in my back patio! It can't help but make one hopeful.

For my card today, I have used the gorgeous Hydrangea Hill DSP. I just love the colors and the flowers and patterns in this DSP. I hope you do too. To see all the selection in this pack of 12" x 12" paper click HYDRANGEA.
Stamp sets are Beautiful Moments and Springtime Joy. Dies are Layering Ovals and Stitched So Sweetly.

Here are the inks I used.

I used the Beautiful Moments stamp set to stamp the image in Memento Tuxedo Black ink onto white card stock; die cut using Layering Oval Dies. I stamped her a second time onto a sticky note and cut the 2nd image out to create a mask. Then using Blending Brushes I colored the sky with 3 colors, starting at the top: Misty Moonlight, Highland Heather, and Rococo Rose. I removed the mask and did the rest of the coloring using Stampin' Blends: Cinnamon Cider & Mango Melody (hair), Ivory (arms), Rococo & Petal Pink (dress), Granny Apple Green (grass), Highland Heather (flowers). Butterflies were stamped in black.

Sentiment is from Springtime Joy, stamped in Gorgeous Grape onto white CS, die cut using Stitched So Sweetly Dies.
Card measurements:
Assemble: glue the layers of DSP and CS to the card base. Use Stampin' Dimensionals to adhere the oval image piece on top. Add the sentiment overlapping the oval, gluing it where it overlaps & using a dimensional where it attaches to the card front.


Inside: I glued a strip of the DSP to white CS measuring 5" x 3 3/4". I stamped the sentiment from Beautiful Moments stamp set in Gorgeous Grape ink. Then I glued this to the inside of the card.
There you have it.
I hope this card brought you some inspiration to get stamping and creating a springtime card of your own. Whatever the weather in your area, inside you can make it spring!

Thank you for taking a look today. Let me know if I can help in any way with your crafting needs. Subscribe to my blog, using the form in the right panel, and receive all future posts directly to your inbox.
Shop my online store HERE. Use Hostess Code 3MF63KXH for purchases that total under $150 (before tax, shipping), and I'll send you a thank you gift. If your total is $150 and over, don't use the code, but rather, choose something with your earned rewards from any current Catalog.
Till the next time, stay safe, be well, take care,
~JULIE

Today is the day!! March 17 from 12:00am (MT) to 11:59pm (MT) get free shipping on your Stampin' Up! orders of $50+.
Shop HERE in my online store.
Hostess Code for March is 3MF63KXH.
Use the code for your orders under $150 and I'll send you a thank you gift. For orders $150+ don't use the code. You will choose your own rewards from current Catalogs.
********************************************************
I have a card for this special day, too.

Supplies:
For a link to these supplies, click SUPPLIES. Add all products to your cart there, or remove supplies you don't need. You will get free shipping on a minimum purchase of $50 (before tax, shipping).

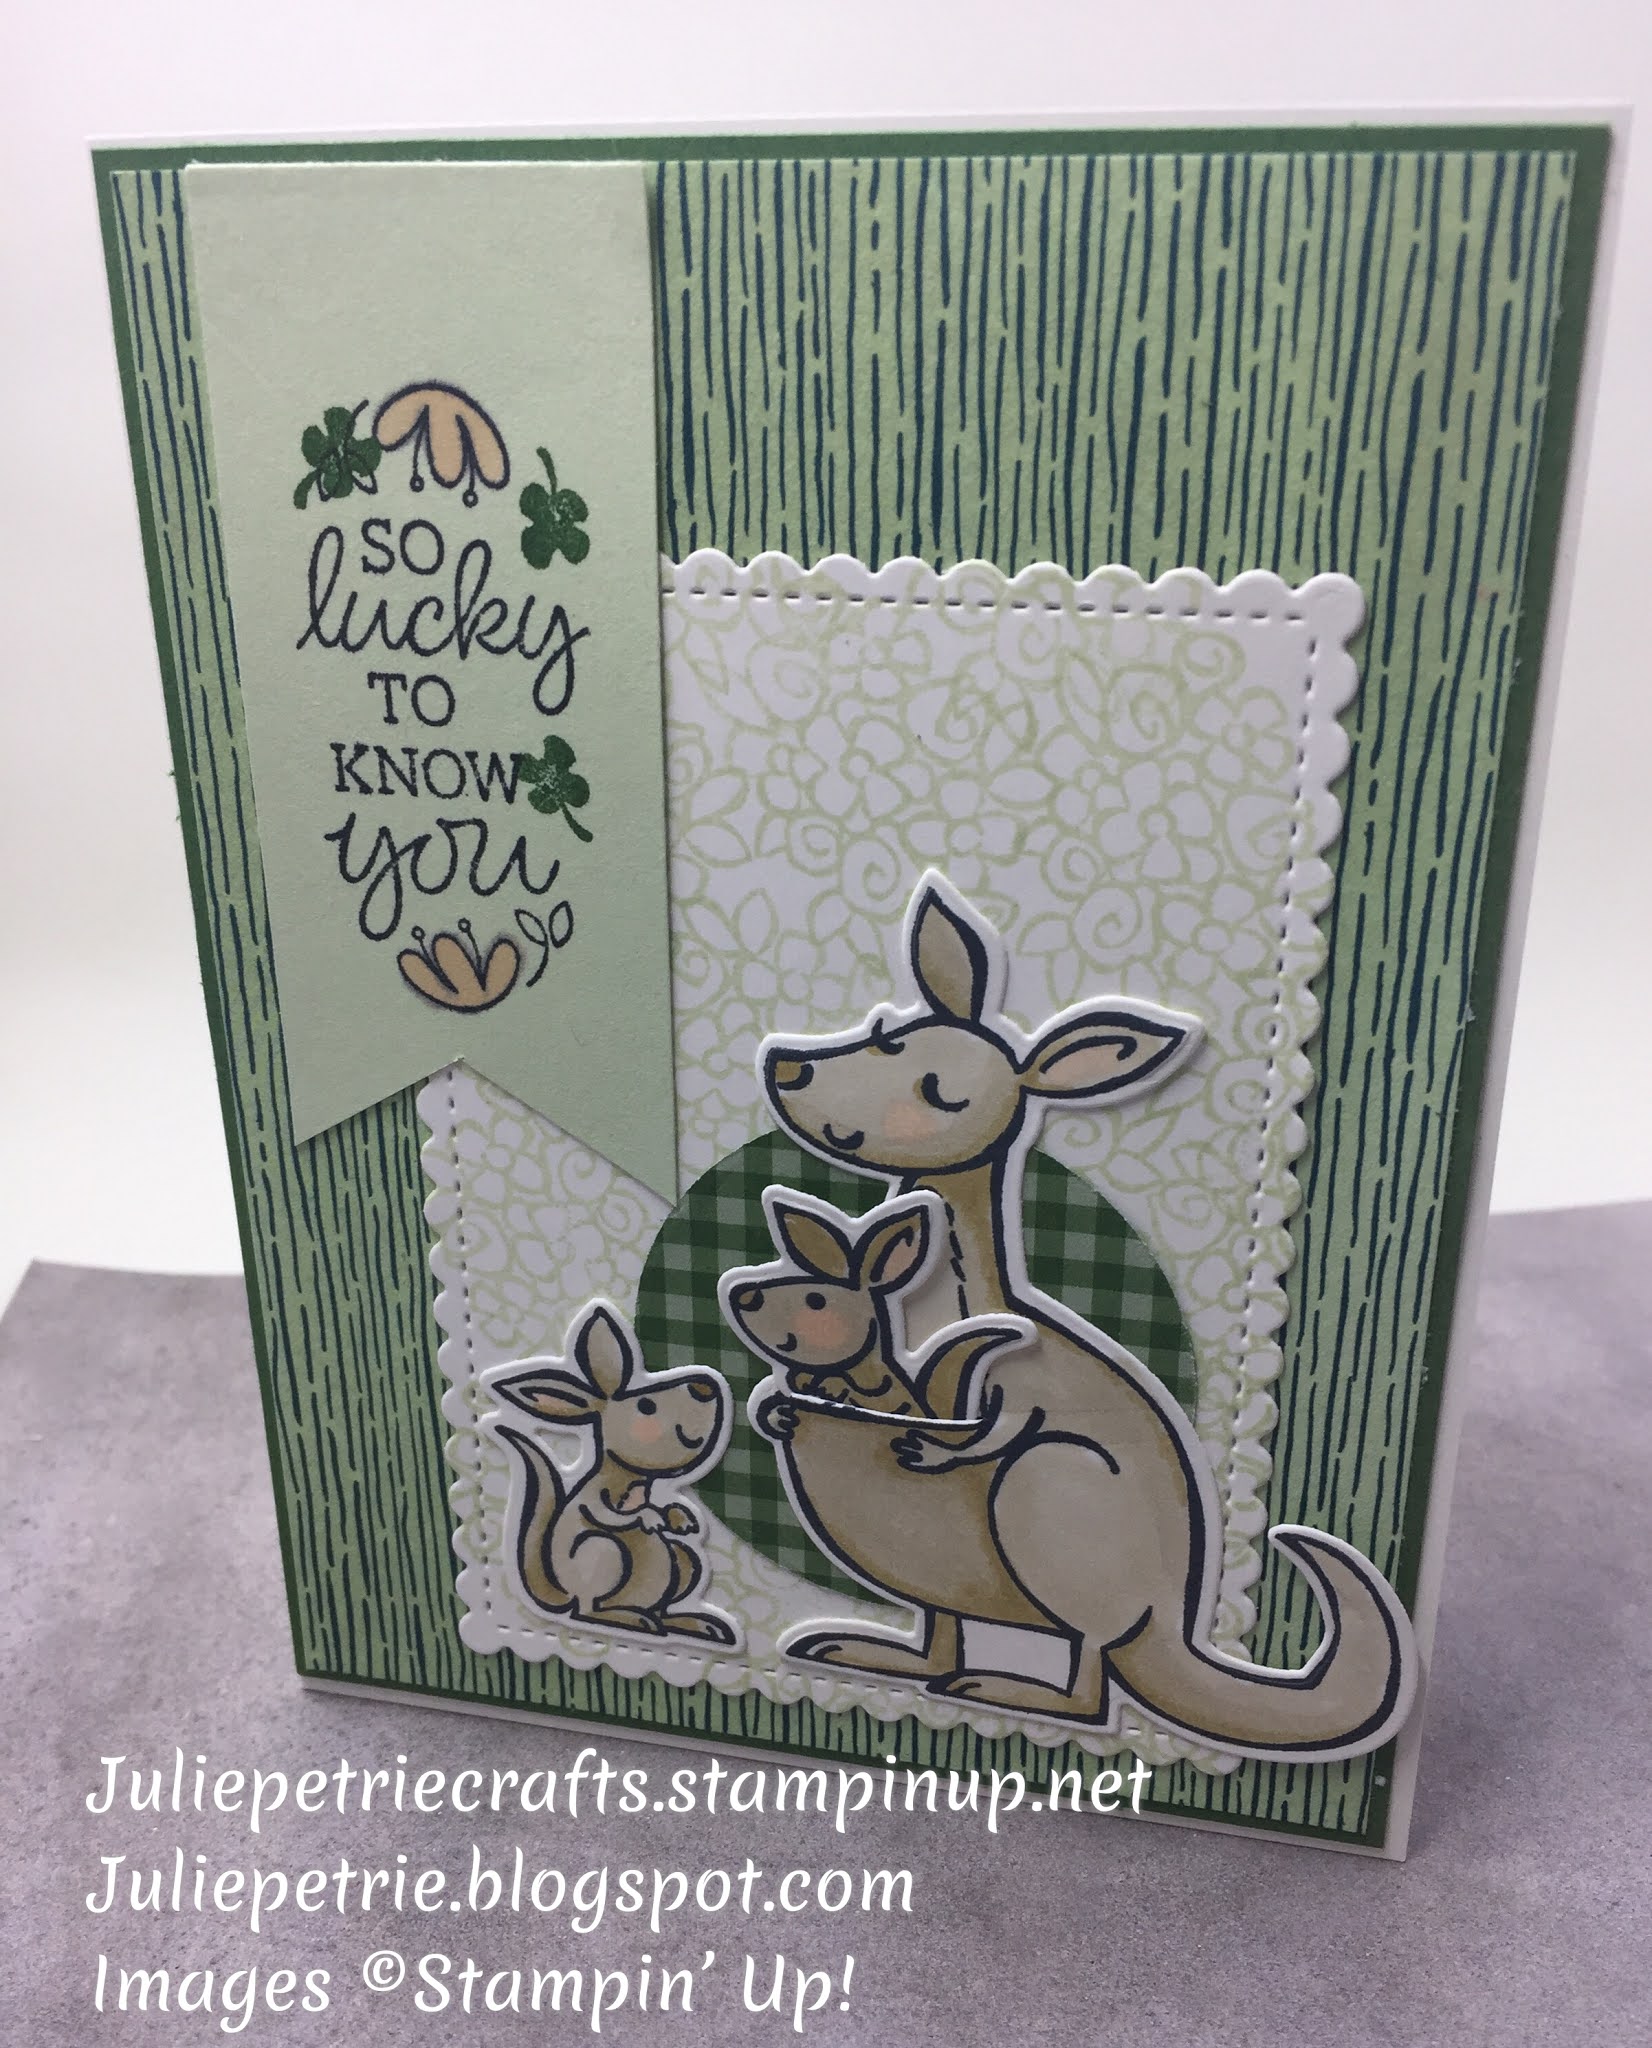
The basics for creating this Kangaroo Card:
Card base is Basic White CS, 8 1/2" x 5 1/2", folded at 4 1/4". Next, a layer of Garden Green CS, 5 3/8" x 4 1/8". A piece of DSP is next, cut 5 1/4" x 4". Using Stitched So Sweetly Dies, cut a piece of Basic White CS with the largest die. Stamp this with the flower image from Kangaroo & Company stamp set using Soft Seafoam ink. Stamp the kangaroos using black ink onto white CS. Die cut with the Kangaroo Dies. Color with Stampin' Blends. Punch out a 2" circle of DSP. Glue the layers onto the card base. For the sentiment: stamp set is Oval Occasions, stamped with black ink onto Soft Seafoam CS and cut as a banner. Shamrocks are stamped in Garden Green. Glue this banner to card front.
There you have it! What do you think of this card? I'd love to hear from you.
Don't miss updates & more stamping ideas - subscribe to my blog and get all future posts directly to your inbox. Just use the form in the right panel to subscribe today.
Ready to get the free shipping special today? It doesn't happen often. It's a great time to stock up on some basic supplies, papers, inks, adhesives, etc. Happy shopping!
Let me know if you have any questions, or if I can help in any way with your crafting needs. Thank you so much for visiting my blog today. I appreciate your interest.
till the next time, take care, keep crafting! Julie

Purchase a minimum of $50 (before tax) and the shipping is free. But only for one day.
WEDNESDAY, MARCH 17 - Sale begins at 12:00 am (MT) and ends at 11:59 pm (MT)
Use Hostess Code: 3MF63KXH with orders under $150 and you'll get a thank you gift from me. For orders $150+ you get to choose your own rewards products from any current Catalog.
SHOPPING TIPS
Happy St. Patrick's Day - MARCH 17 - FREE SHIPPING!!
For 24 Hours Only! When your purchase subtotals at least $50 (before tax), the shipping is FREE. One day only: on March 17th. Sale ends at midnight March 17.
Shop my online store by clicking the button at the top of the blog or HERE. The host code for March is: 3MF63KXH.
*************************************************
Who would think I, an avid gardener, would love snails so much!! If only those in my garden were as cute as the ones in the Snailed It stamp set, right?!

On this card I used a variety of Stampin' Up! products to show how versatile they are. Click any item number to link to my online store. Get FREE SHIPPING on orders of $50 and greater.
HOST CODE: 3MF63KXH
- use this code at checkout on your orders under $150 and get a thank you gift from me. Do not use if your purchase total is $150 or greater; instead, choose your own rewards gift from any current catalog.
Supplies for the snail card:

Measurements & preparation:
Assemble:


Hi, and welcome to this month's blog hop!
Thank you for joining us for our Stampin' Up!® Demonstrators Monthly Team Blog Hop! We are so happy that you could join us today for ideas and creative inspiration.
We are a group of Stampin' Up! ® Demonstrators from around the world who are taking part in training that is helping us to build a successful Stampin' Up!® business and reach some goals we have set. We really appreciate your support.
You may be starting here or have come from another blog - either way, you can find the link list at the bottom of this post so that you can see every blog post and idea today. Don't miss a single one!
This is the card I created for our theme, Thank You.

To create the card, I started with a card base of Soft Seafoam card stock, 11" x 4 1/4", folded at 5 1/2". I added a layer of Basic Black CS 5 3/8" x 4 1/8". Then I adhered a piece of Forever Greenery Designer Series Paper 5 1/4" x 4" on top of that. I just love the bold stripes with various green shades! I used Layering Ovals Dies to cut 2 ovals, one out of Basic Black CS, the other out of Basic White CS; then adhered these to the card front.


The "thanks" is die-cut using Well Written Dies. The label is die-cut from the Potted Succulents Dies. These are then glued to the card front.
The succulents can be colored many different ways, and all arranged in the pot in various positions, too, leaving you lots of possibilities in creating this card.
I hope you like it! Leave me a comment and let me know what you think!

Click on the links below to visit each blog in our group. You are sure to be inspired!
Thanks so much for taking a look, today. Keep crafting! Take care, JULIE 💖
BLOG HOP LINKS
To shop my online store, click HERE.
MARCH Host Code is 3MF63KXH. When your purchase total is under $150 (before tax, shipping), use the host code at checkout & I will send you a thank you gift. Do not use the code if your purchase is $150 or over; instead, you choose your rewards from any current catalog.
Subscribe to my blog: get all future posts delivered directly to your inbox, just use the form at the top right panel.

Hello! Welcome to our Butterfly Bouquet Blog Hop. We are a group of Stampin' Up!© Demonstrators from around the world showing off cards/projects made using the new Butterfly Bouquet products. Scroll down to see the links to all Blog participants - you'll want to visit each one to see the beautiful butterfly creations. The theme is Thank You, Congratulations, Encouragement.
I have created a Thank You Card.

The Butterfly Bouquet bundle of products includes very pretty Butterfly Bijou DSP. I've used a selection on the front of my card. The bundle also includes a large die that coordinates exactly with one of the DSP selections, cutting out 6 beautiful butterflies in one pass through the Cut & Emboss Machine.


To construct my card, I did this:
Starting with a card base of Misty Moonlight CS 8 1/2" x 5 1/2", folded at 4 1/4". Glue on a layer of the Butterfly Bijou DSP, 5 1/4" x 4". Die-cut an opening in the card front using Stitched Nesting Labels Dies. Glue a slightly smaller card base inside, adhering just to the inside-back of the Misty Moonlight; I used Mint Macaron CS 8 1/4" x 5 1/4", folded at 4 1/8". Glue this inside the Misty Moonlight card base.


Next: Using a piece of Basic White CS, stamp the grass & flower images from Field of Flowers stamp set, using Mint Macaron and So Saffron inks. Stamp the "Thank You" from Sweet Ice Cream stamp set, using Night of Navy ink. Die-cut this piece with the Stitched Nesting Labels Dies, one size smaller than the die used to cut the opening in the card front. Close the card and use Stampin' Dimensionals to adhere the image piece inside the "window" on the card front.


Use the large die from Brilliant Wings Dies - the new product - and the Butterfly Bijou DSP sheet that coordinates with the die, to cut out the larger blue butterfly (as well as the other 5 on the sheet; save them for other cards). Glue this pretty butterfly to the card front, overlapping the "window".

For the inside: I used a piece of white CS, 4 3/4" x 3 3/8" and glued a strip of Butterfly Bijou DSP to the bottom edge. Then glue this to the inside of the Mint Macaron CS.

There you have it! What do you think?
I created 2 other cards in a similar manner, using other selections of the Butterfly Bijou DSP, and the previously die-cut butterflies. I coordinated the colors of the butterflies with the card stock card bases. One is another thank you card; the other is a congratulations card.

On the yellow/gray card, the floral image and the "thank you" are from Sweet Strawberry stamp set. On the Calypso Coral & Petal Pink card, the Congratulations is from Vine Design stamp set, and die-cut with Flowering Vine Dies.
I'd love to hear your comments. Do you have a favorite?
I hope you found some inspiration from my cards, today. Now it's time to hop over to the next Demonstrator's blog, from the list below. Have fun looking! Happy Crafting!!
Thank you so much for visiting today. To see all future posts delivered directly to your inbox, subscribe to my blog using the form at the top right-hand panel of my blog.
~JULIE 💕

BLOG LINKS


