THE FIRST CARD:
Card base, basic black cardstock: 8 1/2" x 5 1/2", scored/folded at 4 1/4"
Poppy Parade cardstock layer: 5 3/8" x 4 1/8"
Whisper White cardstock: 5 1/8" x 3 7/8"
Ink pads: Poppy Parade, Basic Gray, Tuxedo Black Memento
Other: Stamparatus (item #146276), Stampin' sponge (141337)
Start with the sun: Punch or die-cut a circle about 1 3/8" from either a post-it or scrap of cardstock; lightly adhere the post-it/cardstock cut-out to the white cardstock & using sponge in a circular motion, apply some Poppy Parade ink.
Position the card with the sun into Stamparatus. (You can also use stamps mounted on blocks.) Place the pagoda slightly overlapping the sun (as if in the background), and the Japanese woman in the foreground (lower on the card). Stamp with Black Memento ink.
On a scrap of cardstock, stamp the woman again, and fussy cut out. This will be the mask, so that you can stamp the mountains in the background (behind the figure). Adhere the mask with a small amount of temporary adhesive - place mask right on top of the stamped image of the figure.
The mountains are from the Mountain Air set, and these are reversible stamps. Using Basic Gray (and again, I used the Stamparatus to get more precise placement), stamp over the masked figure, using the SMOOTH side of the mountain stamp. Clean stamp, flip over, ink with black, and stamp the DETAILED/TEXTURED side of mountains over what you just stamped in gray. Carefully remove the mask. The mountains now appear in the background with the figure in the foreground.
Stamp sentiment in black. Adhere the cardstock layers to finish the card. I also added a shadow to the figure with Basic Black Stampin' Write pen.
SECOND CARD:
I wanted to keep this clean & simple.
Card base, Smoky Slate cardstock: 11" x 4 1/4", scored/folded at 5 1/2"
Whisper White layer: 4 1/16" x 3 3/4"
Stamp the sun in a similar manner, only I made this sun about 1/7/8" diameter; sponge with Poppy Parade ink.
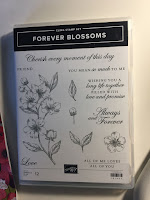
Stamp the blossom branch, from the Forever Blossoms set, in black memento. Stamp the sentiment from the Power of Hope set. (I used a punch to round the corners of the white cardstock - this is certainly optional.)
I hope you'll try some of the techniques used here, the masking, and sponging, as well as two-step stamping that was done on the mountains.
To recreate these cards yourself, all of the products I used here can be purchased -
just go to my online store, clicking here, or on the link at top of the page.
REMEMBER: It's SALE-A-BRATION time at Stampin' Up!
For your purchases of $50 or $100, you choose FREE products from the SAB Catalog (click on Catalog link in the right-hand column of this blog).
Don't miss this chance to get some of these wonderful stamps, papers, dies, etc.
Sale-a-bration runs only through March 31.
Thanks so much for visiting my blog. As always, I'd love to hear what you think of this card. Hope you'll come back soon!
Take care,
~Julie


No comments:
Post a Comment