Pages

Saturday, February 29, 2020

Well Dressed

The 2nd Release of SAB is coming!  Starting March 3 through March 31.  With a purchase of $50 or $100 in products from any current catalog, choose from the free items in SAB catalogs.  I'm highlighting the stamp set from this 2nd Release, called WELL DRESSED.  It's a great set for making a masculine card.

CARD #1

Colors for this first card:
  • Sahara Sand card stock for the card base 8 1/2" x 5 1/2", folded at 4 1/4"
  • Tropical Oasis DSP for layer 4" x 5 1/4"  (item 151252)
  • Whisper White CS 3 1/2" x 4 3/4"
  • Tuxedo Black Memento ink
  • Soft Suede ink
  • Gray Granite ink
  • Stamp sets:  Well Dressed (152300), Parisian Beauty - for the sentiment (item 151466)
Stamp a "smudge" of Gray Granite in two diagonal spots - (I used an old stamp set Happy Watercolor);  Artisan Textures (item 151278) set would be great here.
On top of this, using Memento, stamp the tie-and-collar image and the pen, keys, watch images.
Using the Soft Suede, stamp hat image, and stamp the shoe.  To get the 2nd shoe - place a mask over the first shoe, then stamp the 2nd shoe slightly above & behind.  
(To do a mask, stamp the shoe image on a sticky pad like Post-It; cut out the shoe; stick on top of the first shoe image on the card; stamp 2nd image.)
Finally, stamp the sentiment in Memento in upper corner.

CARD #2:


Colors for the 2nd card:
  • Blueberry Bushel card stock as the base 11" x 4 1/4", folded at 5 1/2"
  • Whisper White layer 4" x 5 1/4"
  • Blueberry Bushel side panel 5 1/8" x 2 3/8"
  • Pleased As Punch DSP layer (raindrops) 2 1/4" x 5"  (153558)
  • Whisper White piece - cut a tag from Bonanza Dies (item 151566, or Bundle 153815)
  •  Inks:  Blueberry Bushel and Balmy Blue
  • Stamp sets: Well Dressed (152300), Under My Umbrella (151518)
  • Dies:  Bonanza Dies, Stitched Rectangles (item 148551)
On the larger white panel, randomly stamp the hat from Well Dressed and the boots from Under My Umbrella, alternating ink colors.   On a piece of white, stamp the umbrellas from Well Dressed, one in each color.  Cut out using the tag die from Bonanza Dies. On another piece of white, stamp the sentiment from Under My Umbrella set in Balmy Blue & cut out with Stitched Rectangle die. 
Adhere the layers using snail adhesive except the sentiment - adhere with Stampin' Dimensionals.


DON'T MISS THE CHANCE TO GET FREE PRODUCTS DURING SALE-A-BRATION!!  GOING ON NOW AND THROUGH MARCH 31!!
In addition to this great set Well Dressed, the 2nd Release SAB Catalog has some beautiful papers and more stamp sets.  But SAB is only through March 31 - so take a look & find your favorites soon!
The items in the 1st Release are still available also, except for the Kerchief Card Kit and the Metallic Baker's Twine & Sequins Combo Pack, which are sold out.

I hope these 2 cards spark some ideas for you.  Don't you love new products, stamp sets and papers!? Shop any of the items mentioned in the blog by going to my online store.
Let me know if you have any questions or comments.
Thank you for taking a look today.
               Take care,   Julie 

Sunday, February 23, 2020

Easter Promise

Lent starts this coming Wednesday, so thoughts are also turning to Easter.

The card I made today used stamps and DSP from the current 2020 January-June Mini Catalog, and other products:
  • Card base:  Pretty Posy card stock 4 1/4" x 11", scored at 5 1/2"
  •  Layer of Best Dressed DSP 4" x 5 1/4"  (DSP is part of the Best Dressed Suite in Mini Catalog)  Suite item 153926, or DSP alone - item 151319
  • Whisper white cardstock for the ovals
  • Layering Ovals Dies 141706
  • Stamp set is Easter Promise (item 151544) in the  2020 January-June Mini Catalog
  • Ink: Highland Heather Classic Stampin' Pad  (147103), Tuxedo Black Memento  (132708)
  • Stampin' Blends:  Light Highland Heather (146881), Light Purple Posy (149564), Light Granny Apple Green (146876)
I stamped the crocus image using Tuxedo Black Memento ink onto white cardstock, then flipped/reversed and  re-inked & stamped it a 2nd time below first image "upside down."  I stamped sentiment in Highland Heather ink onto white cardstock.  Using oval dies, I die-cut out the floral images, and then die-cut the sentiment with a smaller oval die.  I colored in the flowers with the Stampin' Blends.  Adhered the DSP onto the card base with snail adhesive.  Adhered the floral oval with Stampin' Dimensionals (104430).  I used some ribbon accents which I layered onto of the large oval, across the center, using Tear & Tape Adhesive (138995): first a piece of Daffodil Delight Ruched Ribbon (151311), topped with Polka Dot Tulle (146912).

I hope you like this pretty card, and that it may inspire you to create one of your own.
You can purchase all products through my online store, click here.

REMEMBER:  It's SALE-A-BRATION time at Stampin' Up!  

 For your purchases of $50 or $100, you choose FREE products from the SAB Catalog (click on Catalog link in the right-hand column of this blog or here.). 
THE 2ND RELEASE OF SAB WILL BE COMING MARCH 3.
CHECK BACK THEN TO SEE EVEN MORE FABULOUS PRODUCTS I KNOW YOU'LL LOVE!

 Don't miss this chance to get some of these wonderful stamps, papers, dies, etc. 

 Sale-a-bration runs only through March 31.


Take care.   Till next time,       ~Julie

Wednesday, February 12, 2020

Start with Card Making Kit THREE CHEERS FOR YOU...

All inclusive card making kits, like the Stampin' Up! "Three Cheers for You" (item #151304) can help you make a quick and beautiful card.  But don't stop there.  You can also add other stamps and elements and get even more creative!
To see the kit, on page 59 of the January-June Mini, click here, or on the PDF image in the right column.


The base of this card, and the large floral cut-out, are from the kit Three Cheers for You found in the 2020 January-June Mini.  It contains all you need to make 12 cards, including card bases, envelopes, stamps, ink, clear block for mounting the stamps, cut-outs, sequins, labels, twine and glue dots.  With all that's in the kit, you can make some very pretty cards.

But why stop there?!   Use the contents along with other SU products and create even more!

I started with the base card and the floral cut-outs from the Kit.   Then I added images from Power of Hope bundle (#152318), available FREE as a Sale-A-Bration reward with a $100 purchase.  To make the kimono floral, I used a small flower stamp in the Under My Umbrella set (#151518) in the Mini Catalog.  I stamped the sentiment, also in the Power Of Hope set, with Night of Navy ink onto Seaside Spray cardstock; I cut this out with a circle die from Stitched Shapes (#145372), and using dimensional, layered it on top of a pearlized doily, then onto card front.

Colors for this card:  Night of Navy, Seaside Spray.
Embellishments:  Pearlized Doilies #146936. Metallics Sequin Assortment (144214),
Stampin' Deminsionals (#104430)

Try out the kits that Stampin' Up! offers.  All inclusive Kits will have you stamping and creating in no time!
          ~Julie

Saturday, February 8, 2020

Power Of Hope

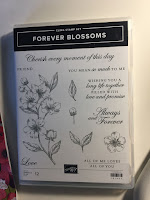
When I saw the stamp set Power of Hope Bundle (item #152318) in the current Sale-A-Bration catalog, it brought to mind images of the classic Japanese prints.  So with that as my inspiration, I made these two cards, also using 2 additional stamp sets from the current 2020 January-June Mini CatalogMountain Air (item #151610) and Forever Blossoms. (item #151457)


THE FIRST CARD:

Card base, basic black cardstock:   8 1/2" x 5 1/2", scored/folded at 4 1/4"
Poppy Parade cardstock layer:  5 3/8" x 4 1/8"
Whisper White cardstock:  5 1/8" x 3 7/8"
Ink pads:  Poppy Parade, Basic Gray, Tuxedo Black Memento
Other:  Stamparatus (item #146276), Stampin' sponge (141337)

Start with the sun:  Punch or die-cut a circle about 1 3/8" from either a post-it or scrap of cardstock; lightly adhere the post-it/cardstock cut-out to the white cardstock & using sponge in a circular motion, apply some Poppy Parade ink.


  Position the card with the sun into Stamparatus.  (You can also use stamps mounted on blocks.)  Place the pagoda slightly overlapping the sun (as if in the background), and the Japanese woman in the foreground (lower on the card).  Stamp with Black Memento ink.

On a scrap of cardstock, stamp the woman again, and fussy cut out.  This will be the mask, so that you can stamp the mountains in the background (behind the figure).  Adhere the mask with a small amount of temporary adhesive - place mask right on top of the stamped image of the figure.

The mountains are from the Mountain Air set, and these are reversible stamps.  Using Basic Gray (and again, I used the Stamparatus to get more precise placement), stamp over the masked figure, using the SMOOTH side of the mountain stamp.  Clean stamp, flip over, ink with black, and stamp the DETAILED/TEXTURED side of mountains over what you just stamped in gray.  Carefully remove the mask.  The mountains now appear in the background with the figure in the foreground.

Stamp sentiment in black.  Adhere the cardstock layers to finish the card.  I also added a shadow to the figure with Basic Black Stampin' Write pen.

SECOND CARD:
I wanted to keep this clean & simple.
Card base, Smoky Slate cardstock:  11" x 4 1/4", scored/folded at 5 1/2"
Whisper White layer:  4 1/16" x 3 3/4"

Stamp the sun in a similar manner, only I made this sun about 1/7/8" diameter; sponge with Poppy Parade ink.
Stamp the blossom branch, from the Forever Blossoms set, in black memento.  Stamp the sentiment from the Power of Hope set. (I used a punch to round the corners of the white cardstock - this is certainly optional.)

I hope you'll try some of the techniques used here, the masking, and sponging, as well as two-step stamping that was done on the mountains.
To recreate these cards yourself, all of the products I used here can be purchased -
 just go to my online store, clicking here, or on the link at top of the page.


REMEMBER:  It's SALE-A-BRATION time at Stampin' Up!  
 For your purchases of $50 or $100, you choose FREE products from the SAB Catalog (click on Catalog link in the right-hand column of this blog). 
 Don't miss this chance to get some of these wonderful stamps, papers, dies, etc. 
 Sale-a-bration runs only through March 31.
Thanks so much for visiting my blog.  As always, I'd love to hear what you think of this card.  Hope you'll come back soon!
            Take care,
                        ~Julie

Sunday, February 2, 2020

Birthday Bonanza Fun-Fold Card

This is such a cute birthday card and fun-fold technique.  My thanks go to Amy Koenders and Kylie Bertucci.  Their cards were truly inspiring. (click on their names to see more.)

For my card, I used the Birthday Bonanza Suite (153929), available to order from the 2020 January-June Mini Catalog.  Clink the link on the right-side panel to view the Catalog.


HINT:  it is best to do the INSIDE of the card first.  Once that is done, finish the card by putting the front layers on.

Here are the measurements for the papers I used:
Inside:
Birthday Bonanza DSP cut 8 1/4" x 5 1/4"; score at 2 1/3", 4 1/8" and 6 1/8". You will cut out the oval in the center of the DSP with layering oval dies, next-to-the-largest size.  A "frame" of Bermuda Bay cardstock is cut using the largest & next largest ovals, nested inside one-another & run through die-cutting machine.  Glue this band of Bermuda Bay to the oval "window."
Sentiment is stamped on white and cut with Stitched Rectangle Dies.

Front of card:
  •  Card base is Whisper White 8 1/2" x 5 1/2", scored at 4 1/4".  Wait to fold this AFTER stamping the images inside.
  • Layer of Terracotta Tile 3 3/4" x 5"
  • Birthday Bonanza DSP layer - 4 3/4" x 3 1/2"
  •  Lion image is found on the Birthday Bonanza DSP, and die cut with a circle from Stitched Shapes dies.   And the sentiment, Happy Birthday (stamped in Bermuda Bay ink) is cut from Stitched Rectangles dies.
Basic steps:
--First, stamp the images inside the card on the Whisper White card base (inside), centered on the cardstock before folding the card, and before adhering the DSP. The Stamparatus (146276) came in very handy in placement and stamping of the images.

-- After stamping these images, go ahead and fold on the score line.


Now cut the oval "window" from the DSP using the next to largest oval die.


Then cut the frame in Bermuda Bay by nesting the largest and the next-to-largest dies.
 Glue the frame to the window.


Fold on the score lines of the DSP.  Adhere to the inside of the white cardstock, with your images viewed through the oval window.  Adhere just the far left and far right edges of the DSP.


-Stamp the toucan onto white using Memento black ink.  I colored the beak with Stampin' blends.  Use the Bonanza Dies to cut it out.  Don't forget to give him a party hat!  
  Adhere to the front of the oval. 
 The banner is cut, also with Bonanza Dies, in Terracotta cardstock and adhered to inside surface of the oval.  You can add a sentiment to side panel; I cut it with one of the Stitched Rectangle Dies.


For front of card, layer the balloon DSP onto Terracotta, then adhere to front of card; cut out lion image from DSP with Stitched Shapes circle die, & adhere with Stampin' Dimensionals; stamp sentiment in Bermuda Bay ink & cut with Stitched Rectangle die; adhere sentiment to front.

I hope you try this technique.  It can work with so many images... just let your imagination go wild! 


REMEMBER:  It's SALE-A-BRATION time at Stampin' Up!  
 For your purchases of $50 or $100, you choose FREE products from the SAB Catalog (click on Catalog link in the right-hand column of this blog or here.). 
 Don't miss this chance to get some of these wonderful stamps, papers, dies, etc. 
 Sale-a-bration runs only through March 31.
Thanks so much for visiting my blog.  As always, I'd love to hear what you think of this card.  Hope you'll come back soon!
            Take care,
                        ~Julie


Saturday, February 1, 2020

Sale-A-Bration - Honey Bee Coordinating Papers

This card features one of the SALE-A-BRATION items that you can choose FREE when you make a purchase of $50 on Stampin' Up! products:  the Golden Honey Specialty DSP.  It also uses stamps and dies from the 2020 January-June Mini Catalog.  View PDF of both Catalogs in the right-hand column.


GOLDEN HONEY SPECIALTY DESIGNER SERIES PAPER (Item 152311)
Colors are Black, gold foil, white.  Order here.


The stamp set Honey Bee is from the 2020 January-June Mini Catalog, and has coordinating dies.  Purchase the stamps and dies in a BUNDLE and save 10%.  See them in my online store, now.  

The card base is Daffodil Yellow card stock, 4 1/4" x 11" folded at 5 1/2". 
 Layers: The honeycomb paper is 3 3/4" x 5" and the floral piece is 2 5/8" x 5 3/8".

  Stamp the hive with Daffodil Yellow onto Whisper White cardstock and die cut. Stamp bee in Tuxedo Black Memento onto white; use blender pen to color in the striped body in Daffodil Yellow.  Die cut.  Stamp sentiment onto white, cut out using die from Stitched So Sweetly Dies; layer Daffodil behind.

Other elements:
SALE-A-BRATION
 is going on now through March 31.  
To view the Catalog, click the image on the right-side of this blog, and see also the January-June Mini Catalog.  
I hope you'll check out the Honey Bee products and more. Let me know what you think.
Take care,
Julie


Honey Bee Valentine

This pretty Valentine combines the Honey Bee Bundle and elements from the From My Heart Suite, specifically the Specialty Designer Series Paper, the Heart Doilies and the Heart Punch Pack.

Starting with a card base in Flirty Flamingo cardstock, cut 4 1/4" x 11", scored at 5 1/2".
Front layer is a piece of the From My Heart Specialty DSP 4" x 5 1/4".

    Stamp the bee hive in Flirty Flamingo onto Whisper White cardstock and die cut with the dies from Detailed Bee Dies. (save 10% by purchasing the bundle with Honey Bee stamps.)
    Punch 2 hearts, one in Whisper White, and the scalloped one in Flirty Flamingo.  Stamp sentiment on the white heart.  Layer white onto Flirty Flamingo and then onto one of the Real Red Heart Doilies.

Now to assemble:  cut a strip of specialty DSP - I used the stripes to add another feature to the front - then adhere the hive.  Using Stampin' Dimensionals I overlapped the hearts onto the hive.   Add the bee by stamping it in Tuxedo Black Memento onto Flirty Flamingo and die cutting.

 The bee's "path"(optional) is from the Ladybug coordinating products available on Feb.4 (coordinates with the Little Ladybug stamps from Sale-A-Bration).

When ordering in my online store, be sure and use this month's Hostess Code:  34RMFGKQ if your order is under $50, and I'll send you a thank-you gift.   For orders $50 and over, you choose your own reward products from any current catalog.

REMEMBER:  It's SALE-A-BRATION time.
For every $50 or $100 purchase, choose an item from the SAB Catalog.  Click on the Catalog link here or on right-hand side panel.
It's also a great time to join as a Demonstrator during SAB.  For just $99 Starter Kit, you choose $125 worth of Stampin' Up! products.  AND get these items FREE:
- A new Mini Paper Cutter
- A 6" X 6" Designer Series Paper sampler
- YOUR choice of any stamp set in current Catalogs (excluding hosts sets & SAB)
Please contact me if you are interested in joining (see links at top of blog). 

How do you like the Valentine card?  You can vary elements to make it your own personal version.  Try it!

I hope you found some ideas for your own creations.  Let me know what you think, or if you have any questions; you can leave a comment below.  Till the next time, take care!      ~Julie

Retired from Stampin' Up!®

 Hello readers, Please note:  I have retired from Stampin' Up!® - I am no longer an Independent Demonstrator.  It's been a great run...